
Introduction
Remote Desktop Protocol (RDP) allows you to connect to a Windows Server remotely, providing full access to its desktop and applications as if you were sitting in front of it. This is particularly useful for system administrators managing servers from afar, troubleshooting issues, or accessing resources without physical presence. Enabling Remote Desktop on Windows Server is a straightforward process, but it requires administrative privileges and careful consideration of security to prevent unauthorized access.
In this article, we’ll cover the prerequisites, step-by-step instructions for enabling RDP on various Windows Server editions (such as 2016, 2019, 2022, and 2025), how to add users, and important security tips. Note that while the steps are similar across editions, some variations may exist based on whether you’re using Server Core or Desktop Experience installations. For Server Essentials editions, there are additional limitations like a maximum of 25 user accounts and 50 devices.
Prerequisites
Before enabling Remote Desktop, ensure the following:
- You must have administrative privileges or be a member of the Administrators group on the server.
- The server is powered on and connected to the network.
- Network access is available to the server (local or via internet/VPN).
- Firewall rules allow RDP connections (default port 3389).
- For connections from outside the local network, consider setting up port forwarding, a VPN, or using Azure Virtual Machines with proper security groups.
Step-by-Step Guide to Enable Remote Desktop
There are a few ways to enable RDP, depending on your server’s configuration. We’ll cover the most common methods: via Server Manager (recommended for server editions) and via System Settings.
Method 1: Using Server Manager (For Windows Server Editions like 2022 Essentials)
- Log in to the server with an administrator account.
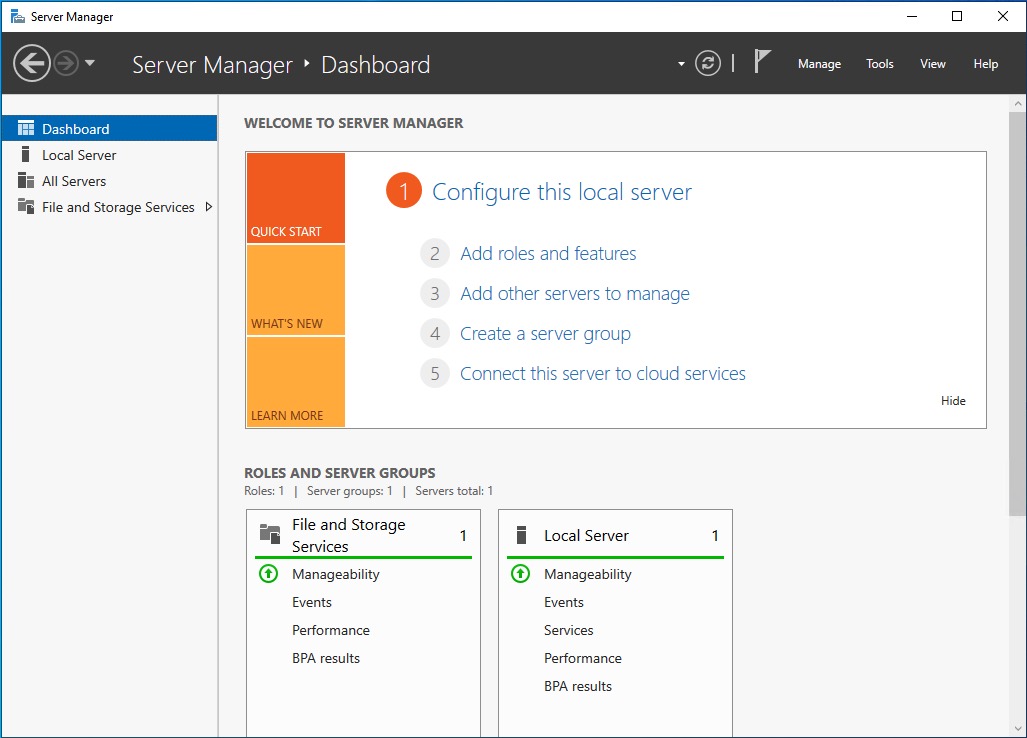
- Open Server Manager (it usually opens automatically on login; otherwise, search for it in the Start menu).

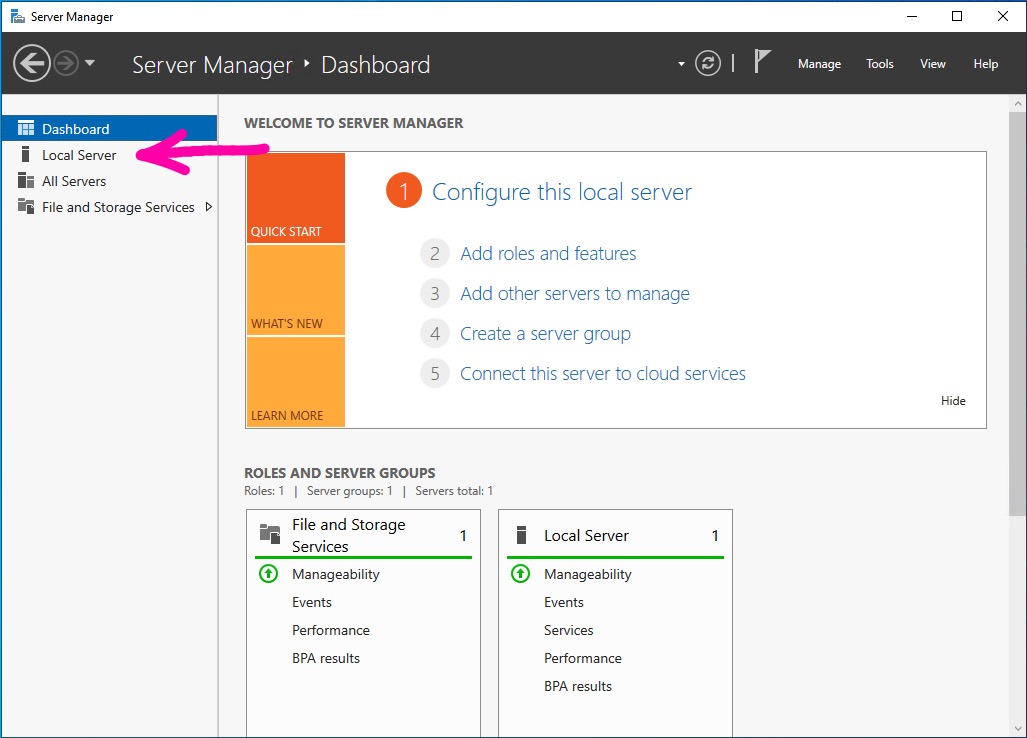
- In the left pane, click on Local Server.
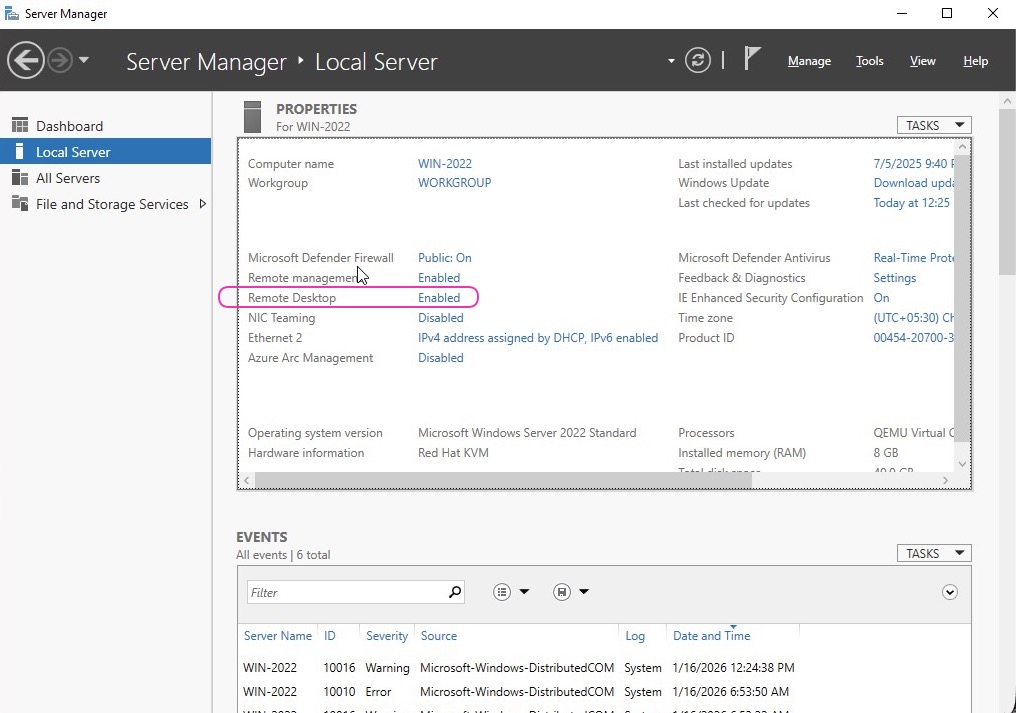
- In the Properties section, locate the Remote Desktop setting. If it shows “Disabled,” click on the hyperlink next to it.

- This opens the System Properties window. Switch to the Remote tab.

- Under the Remote Desktop section, select Allow remote connections to this computer.

- For enhanced security, check the box for Allow connections only from computers running Remote Desktop with Network Level Authentication (recommended).
- Click OK to save changes. You may need to confirm the action.
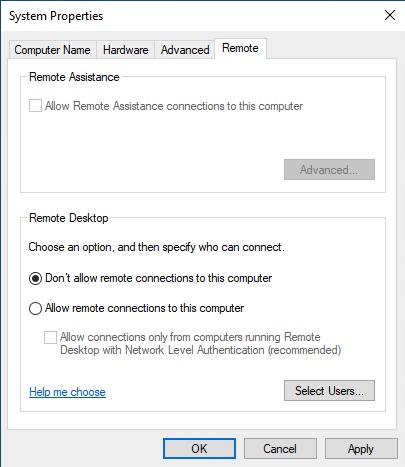
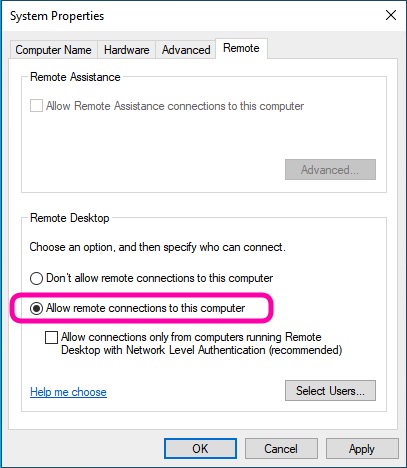
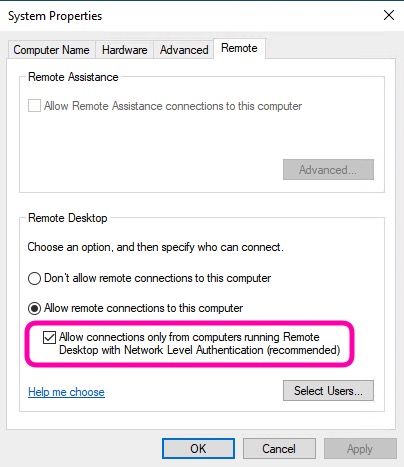
Here’s a screenshot of the System Properties window for reference:
Method 2: Using System Settings (For Servers with Desktop Experience)
- Click Start > Settings (gear icon) > System.
- Select Remote Desktop from the left menu.
- Toggle Enable Remote Desktop to On.
- Confirm the pop-up dialog to enable it.
- By default, the server will be discoverable on private networks for automatic connections.
Adding Users for Remote Access
By default, only members of the Administrators group can connect via RDP. To allow other users:
- In the Remote Desktop settings (from Method 2), click Select users that can remotely access this PC (or Remote Desktop users in newer versions).
- Alternatively, from System Properties (Method 1), click Select Users.
- Click Add, enter the username (e.g., domain\username or local username), and click OK.
- You can add multiple users at once. Ensure these users have strong passwords.
Security Considerations
Enabling RDP exposes your server to potential risks, as it opens TCP port 3389. Follow these best practices:
- Use Network Level Authentication (NLA): This requires users to authenticate before establishing a session, reducing vulnerability to attacks like denial-of-service.
- Strong Passwords: All allowed accounts should have complex, unique passwords. Consider enabling multi-factor authentication (MFA) via tools like Azure AD or third-party solutions.
- Firewall and Network Restrictions: Only allow RDP from trusted IP addresses. Use Windows Firewall to restrict access or implement a VPN for external connections.
- Avoid Public Exposure: Never expose RDP directly to the internet without safeguards like RD Gateway or Azure Bastion.
- Regular Updates: Keep your server patched to protect against known vulnerabilities (e.g., BlueKeep).
- Limitations on Essentials Editions: Supports up to 25 users and 50 devices; no advanced features like RemoteApp.
If you’re connecting from a client, use the Remote Desktop app and enter the server’s IP or hostname.
By following these steps, you can securely enable Remote Desktop on your Windows Server, enhancing remote management capabilities while minimizing risks. If you encounter issues specific to your setup, consult Microsoft’s official documentation or support forums.
