Introduction
Remote Desktop Protocol (RDP) on Windows Server uses TCP port 3389 by default for remote connections. While this is convenient, it’s a common target for automated attacks and brute-force attempts. Changing the RDP listening port adds a layer of security through obscurity, making it harder for unauthorized users to discover and exploit the service. However, this should not replace other security measures like strong authentication, firewalls, and VPNs.
This article provides a comprehensive guide on how to change the RDP port on Windows Server editions (such as 2016, 2019, 2022, and 2025). We’ll cover methods using the Registry Editor and PowerShell, updating the firewall, and essential security tips. Always back up your system before making changes, as incorrect modifications can disrupt remote access.
Prerequisites
- Administrative privileges on the server.
- Access to the server console or an existing RDP session (changes may disconnect you, so plan accordingly).
- Backup the registry using Registry Editor’s export feature or create a system restore point.
- Choose a new port number between 1024 and 65535 that’s not in use by other services (check with netstat -ano or PowerShell’s Get-NetTCPConnection).
- Ensure your firewall and any network devices (routers, etc.) are configured to allow the new port.
Step-by-Step Guide to Change the RDP Port
You can modify the port via the Registry Editor (GUI method) or PowerShell (command-line). After changing the port, update the firewall and restart the server or service.
Method 1: Using Registry Editor
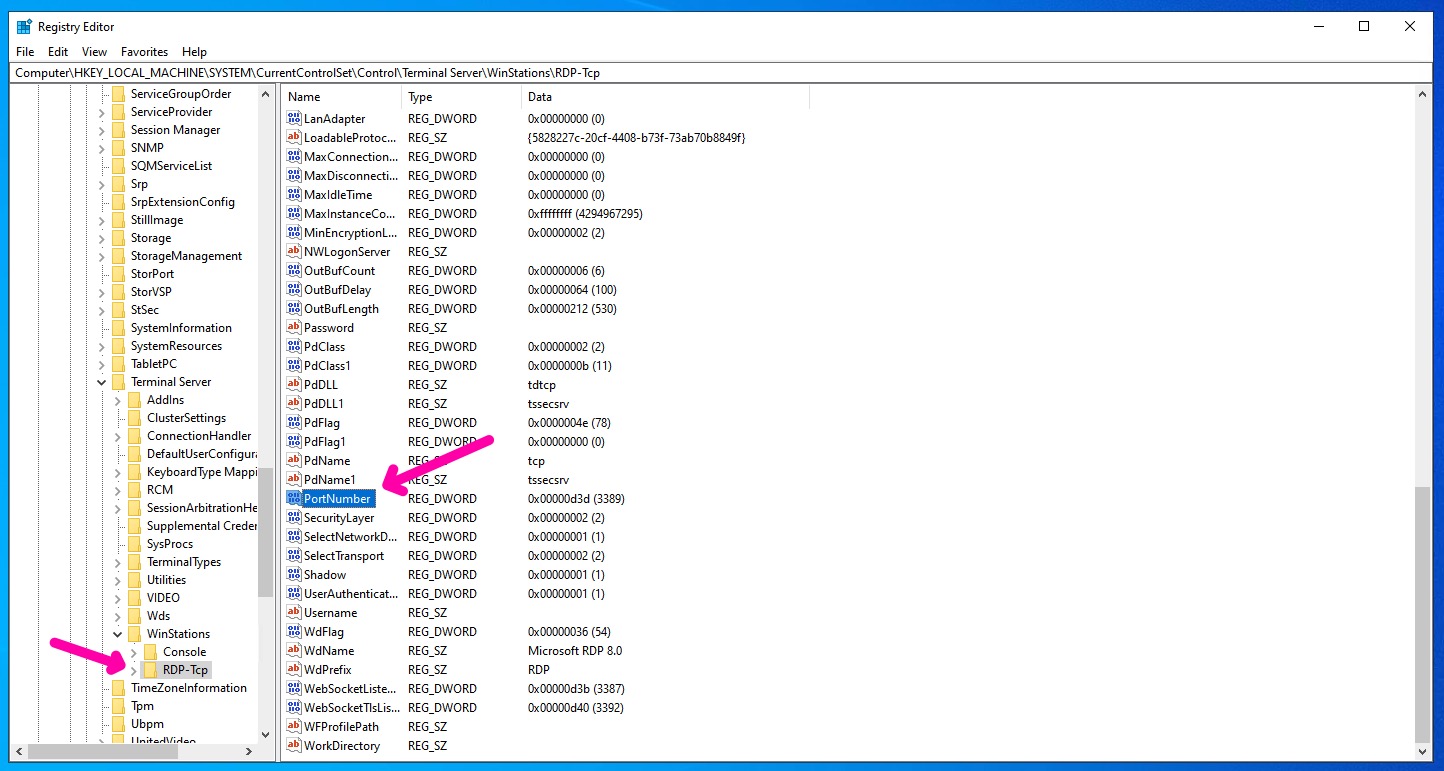
- Press Windows + R, type regedit, and press Enter to open the Registry Editor.

- Navigate to the following key:
HKEY_LOCAL_MACHINE\SYSTEM\CurrentControlSet\Control\Terminal Server\WinStations\RDP-Tcp
- Locate the PortNumber value on the right pane. Right-click it, select Modify.

- In the Edit DWORD dialog, switch the Base to Decimal, enter your new port number (e.g., 5678), and click OK.
- Close the Registry Editor.


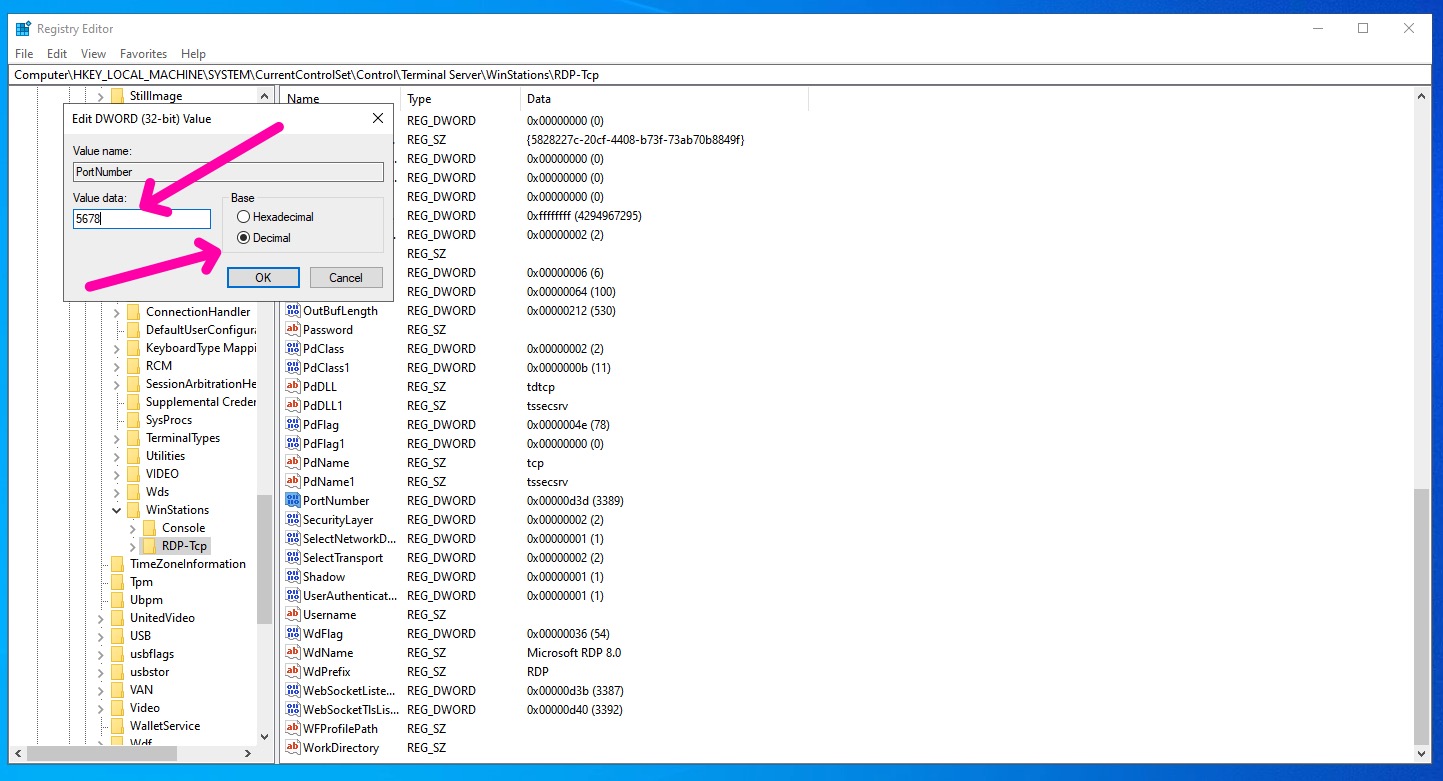
Warning: Do not restart the server until you open the new port in the windows firewall.
Method 2: Using PowerShell
- Open PowerShell as an Administrator.
- Verify the current port:
Get-ItemProperty -Path 'HKLM:SYSTEMCurrentControlSetControlTerminal ServerWinStationsRDP-Tcp' -Name 'PortNumber' - Set the new port (replace 3390 with your choice):
Set-ItemProperty -Path 'HKLM:SYSTEMCurrentControlSetControlTerminal ServerWinStationsRDP-Tcp' -Name 'PortNumber' -Value 3390 - Restart the Remote Desktop service:
Restart-Service -Name TermService -Force
Or restart the server if needed.
Warning: Do not restart the server until you open the new port in the windows firewall.
Updating the Windows Firewall
After changing the port, create a new inbound rule to allow traffic on the custom port:
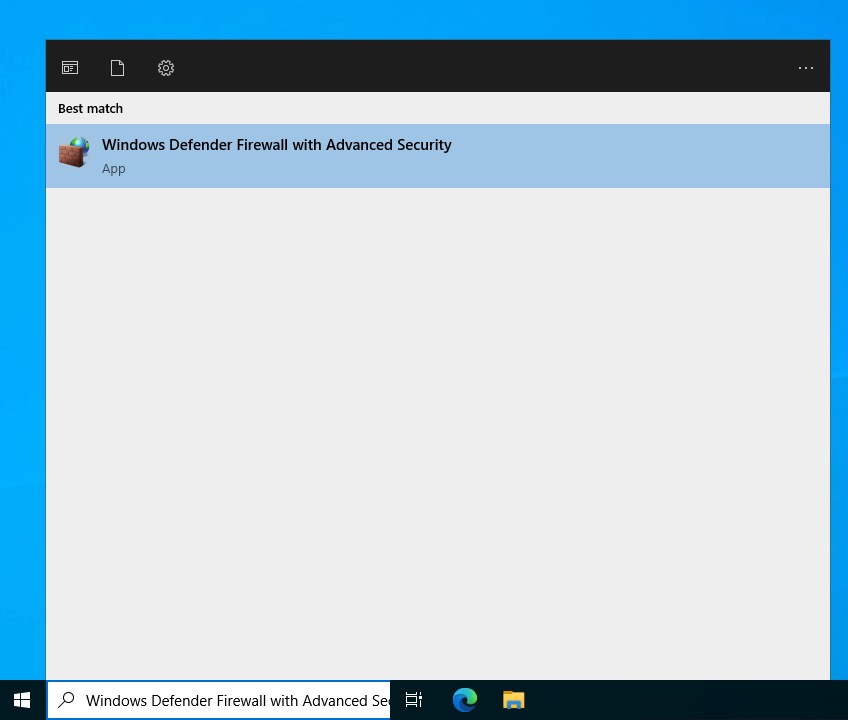
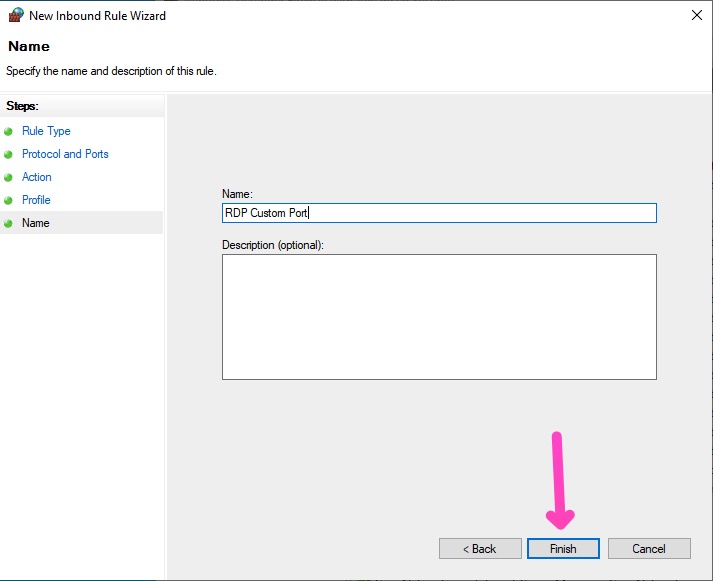
- Open Windows Defender Firewall with Advanced Security (search in Start menu).

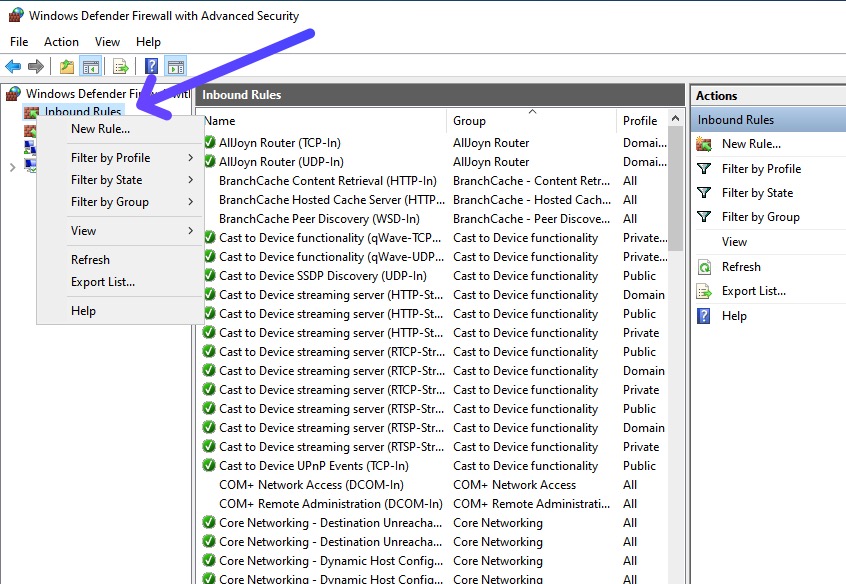
- In the left pane, right-click Inbound Rules and select New Rule.

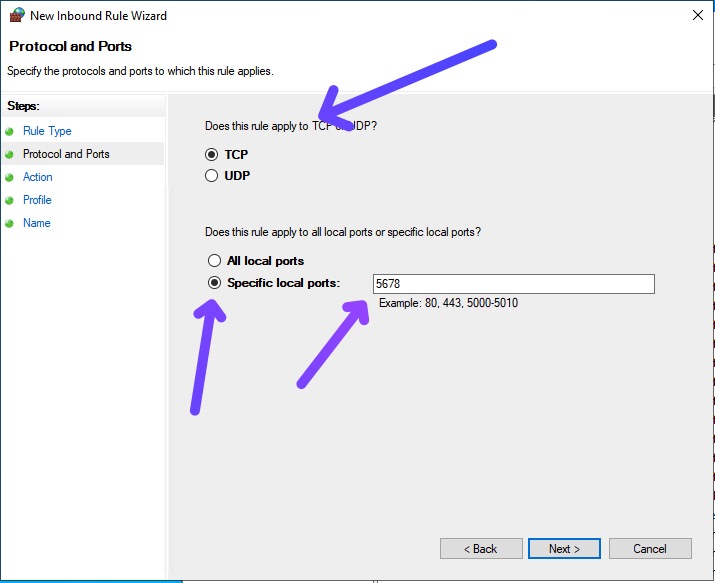
- Choose Port > TCP > Specific local ports, enter your new port (e.g., 5678).

- Select Allow the connection.
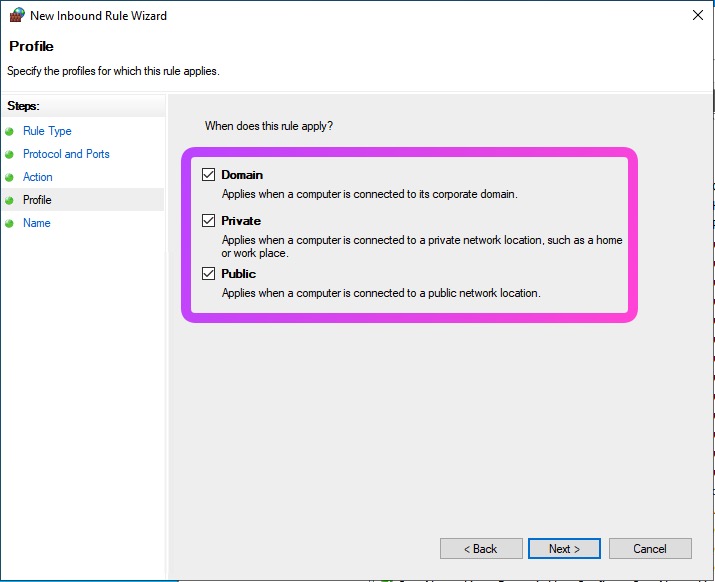
- Apply to all profiles (Domain, Private, Public) or as needed.

- Name the rule (e.g., “RDP Custom Port”) and finish.
- Optionally, disable or delete the default RDP rule for port 3389 to avoid exposure.